AssistiveTouch on iPhone and iPad is one of the highly useful features for accessibility. It allows you to control your iPhone using software shortcuts instead of hardware buttons and also lets you customize gestures. If your iPhone Home button is broken, with the help of AssistiveTouch, you can use the device without any issues.

AssistiveTouch feature is disabled by default, and in this guide, we will share steps on how to enable and disable AssistiveTouch on iPhone and iPad quickly.
TABLE OF CONTENTS
How to Add AssistiveTouch to Accessibility Shortcut
If you are the person who is looking to use the AssistiveTouch feature when needed and disable when not in need, then you can save a lot of time adding AssistiveTouch to the Accessibility Shortcut feature.
Once added, you can quickly enable and disable the AssistiveTouch feature from the Control Center or using the Side/Power button or by triple-clicking the Home button.
Here’s how to add AssistiveTouch to the Accessibility Shortcut feature
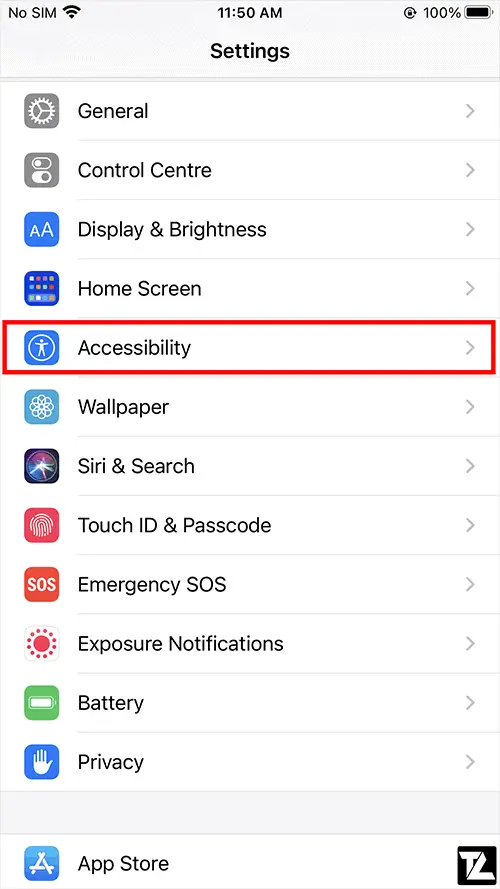
- Open Settings on your iPhone or iPad.
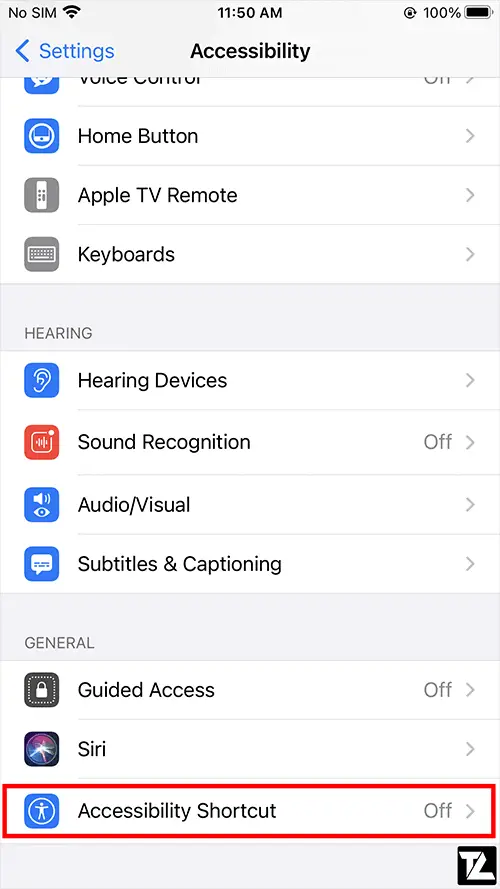
- Go to Accessibility and scroll down.
- Tap on Accessibility Shortcut option.
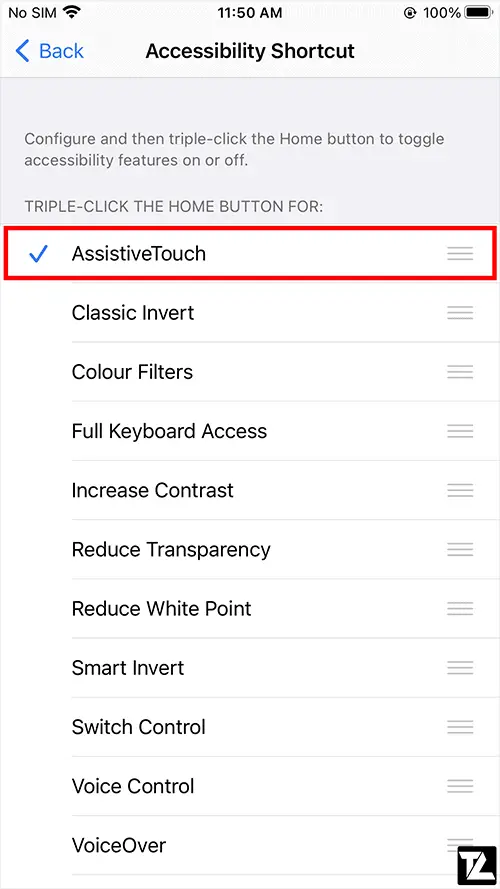
- Now, select AssistiveTouch.
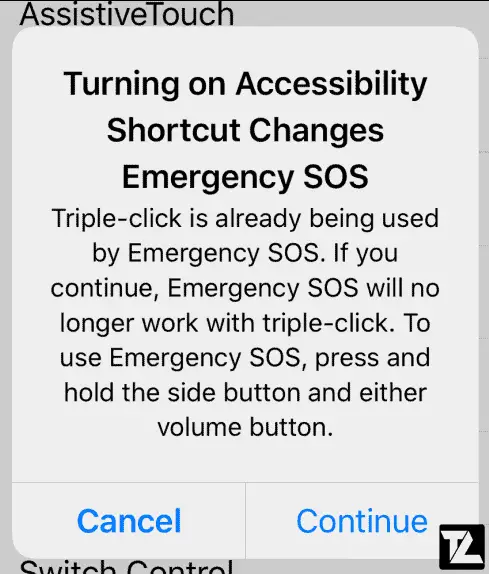
- Your iPhone or iPad may warn you that after enabling the Accessibility Shortcut feature, Emergency SOS will no longer work by triple-clicking the Side/Power button. Instead, you’ll have to press and hold the side/power button and either of the volume button.
- Tap on Continue to proceed.
- The Accessibility Shortcut feature is now active, and upon triple-clicking the side/power button or Home button, AssistiveTouch will be enabled, again on triple-clicking, it will be disabled.
How to Quickly Disable and Enable AssistiveTouch using Control Center
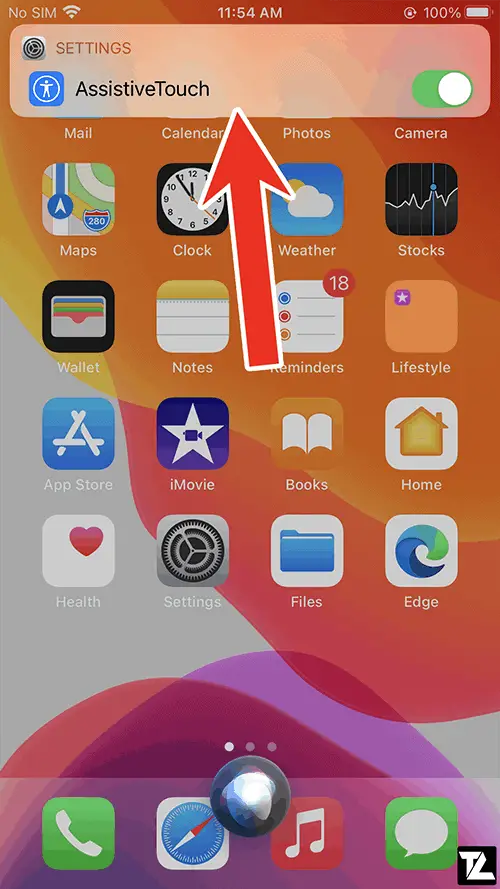
If you want to disable and enable AssistiveTouch from Control Center quickly, then you can add Accessibility Shortcut control to the Control Center.
Here’s how to add Accessibility Shortcut control to Control Center
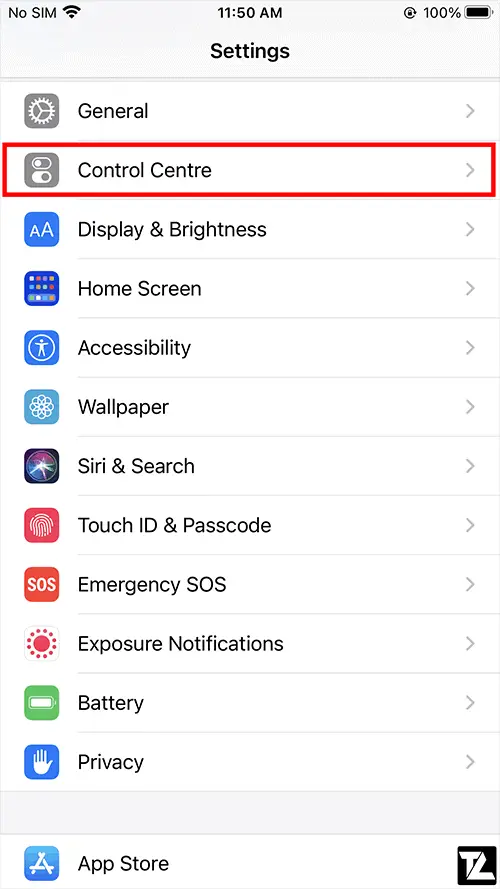
- Open Settings on your iPhone or iPad.
- Go to Control Center settings.
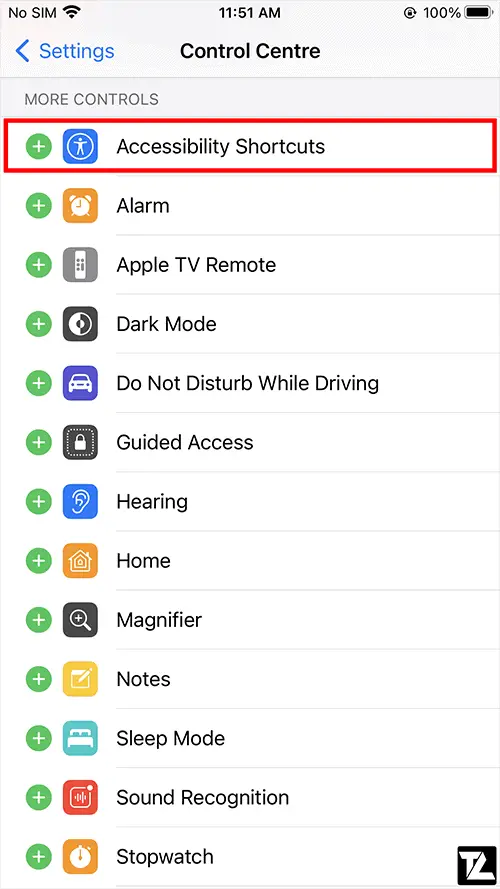
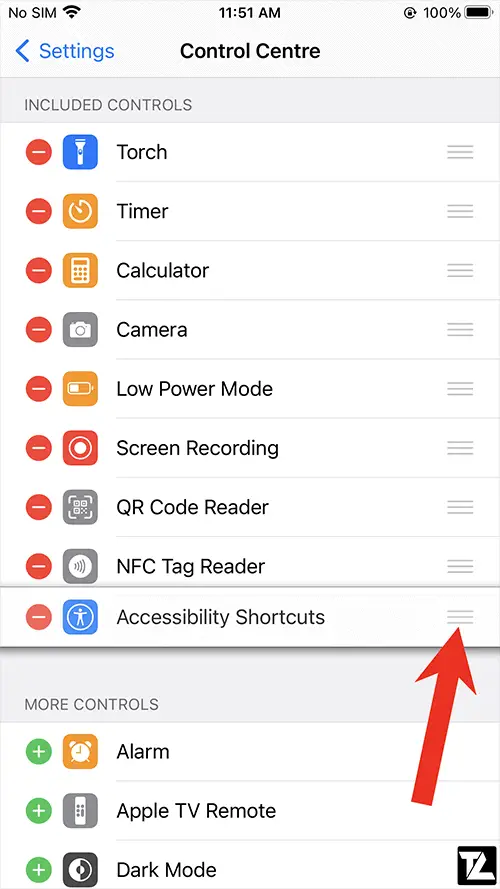
- Scroll down and add Accessibility Shortcut by tapping on the Plus (+) button.
- You can use the three-line icon to reorder controls in your Control Center.
- Now, open Control Center and tap on the Accessibility Shortcut icon.

- You’ll be provided with the features enabled in Accessibility Shortcut.
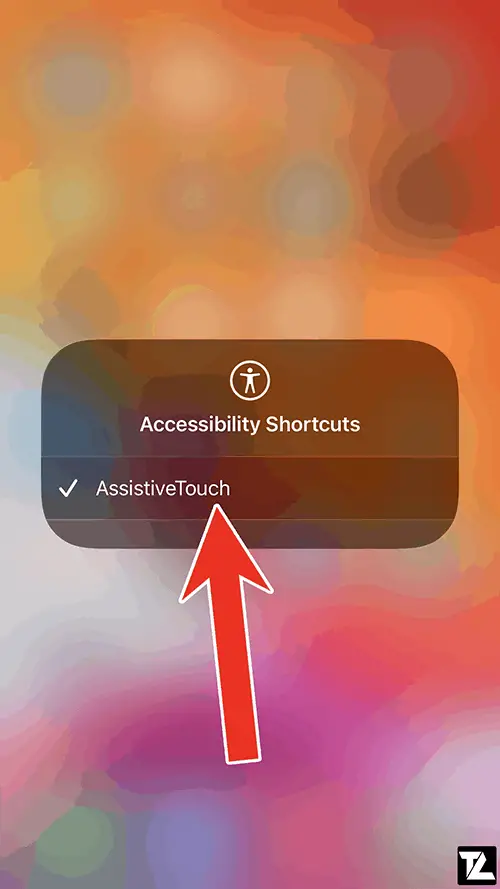
- Tap on AssistiveTouch to enable or disable the feature.
How to Get AssistiveTouch on iPhone or iPad using Siri
If you don’t want to navigate through all the settings or open Control Center, then you can simply ask your personal assistant Siri to enable or disable AssistiveTouch on your iPhone or iPad.
Here’s how to ask Siri to Enable or Disable AssistiveTouch
- Press and hold the Home button or Side/Power button or simply say “Hey Siri” to bring up Siri.
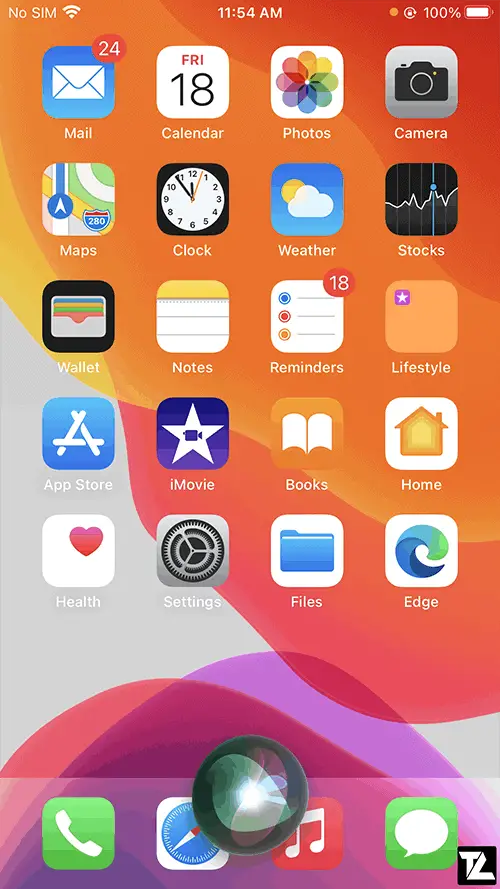
- Now, say “Turn on AssistiveTouch” to enable AssistiveTouch or “Turn off AssistiveTouch” to disable AssistiveTouch.
- Siri will now enable or disable AssistiveTouch depending on your command.
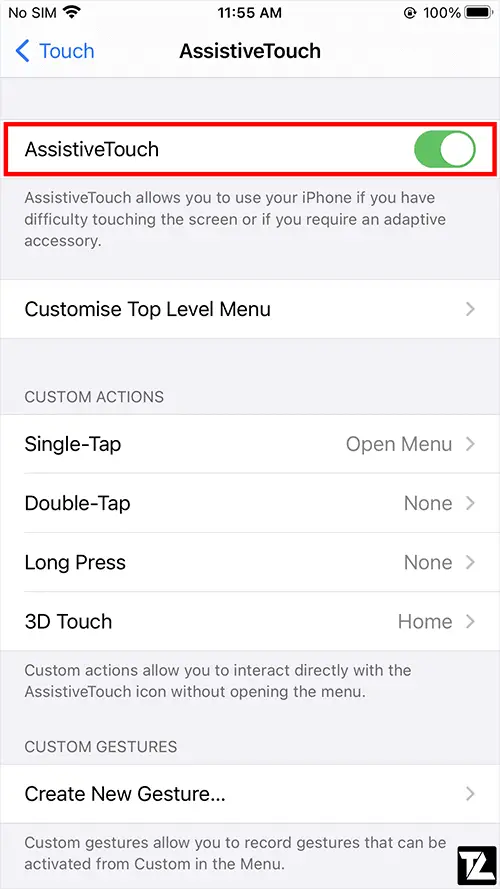
How to Turn On or Off AssistiveTouch on iPhone or iPad from Settings
This is one of the traditional methods to turn on or off AssistiveTouch. It is not quick and easy compare to the previous methods. If you still want to use this method to turn off or turn on AssistiveTouch, then follow the instructions listed below.
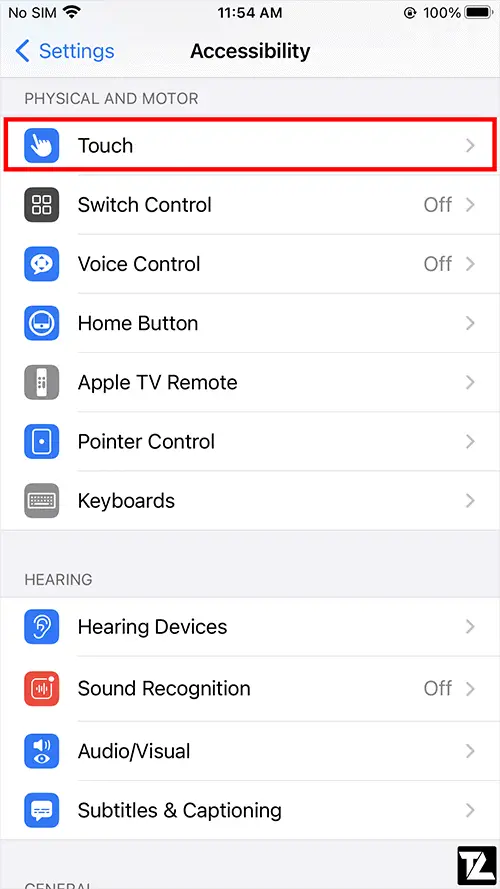
- Open Settings on your iPhone or iPad.
- Go to Accessibility settings.
- Open Touch settings.
- Tap on the AssistiveTouch option.
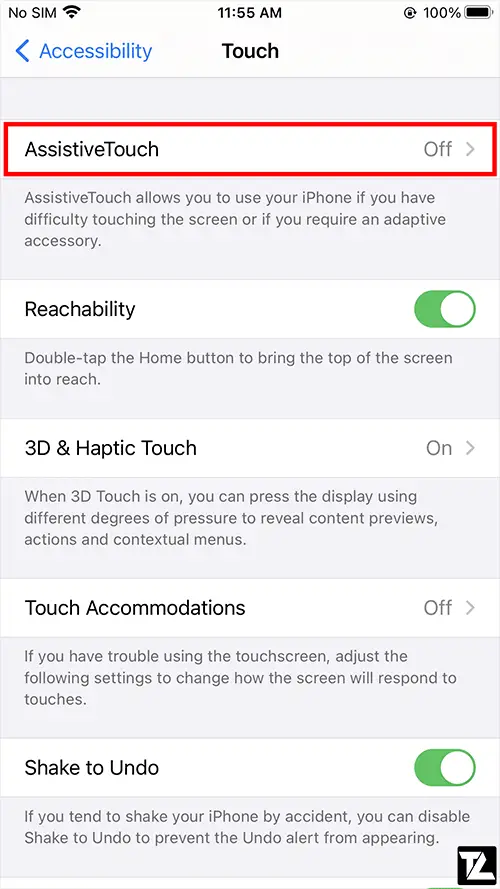
- Turn on or off the toggle to disable or enable the AssistiveTouch feature.
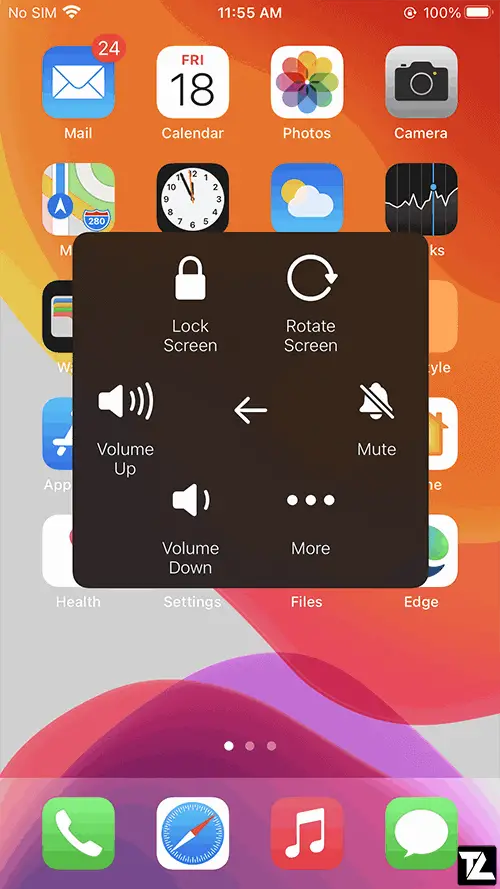
Once the AssistiveTouch is enabled on your iOS device, you can use it to control the device. You can press the Home button, Launch Control Centre, use Siri, and open the Notification Centre from the software shortcuts.
It also comes with a Device option; by tapping on, it provides more options like Lock Screen, Rotate Screen, Volume Up, Volume Down, Mute, Multitasking, Shake, SOS, and Screenshot, etc.
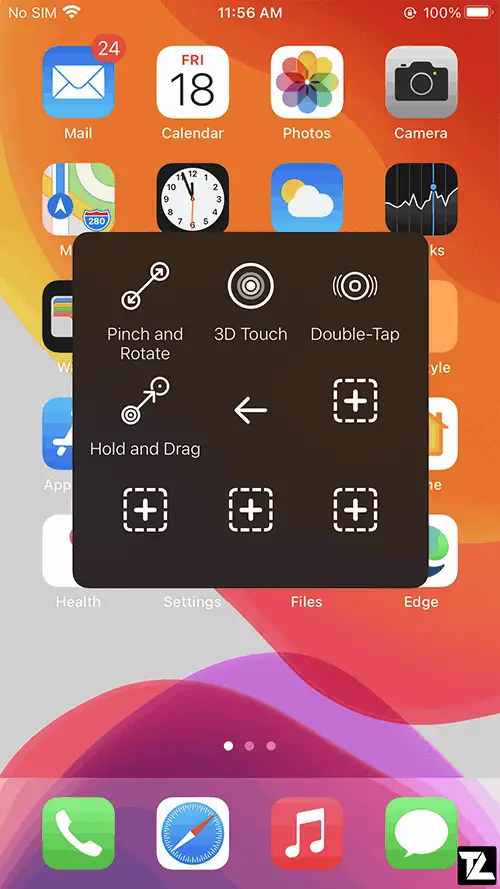
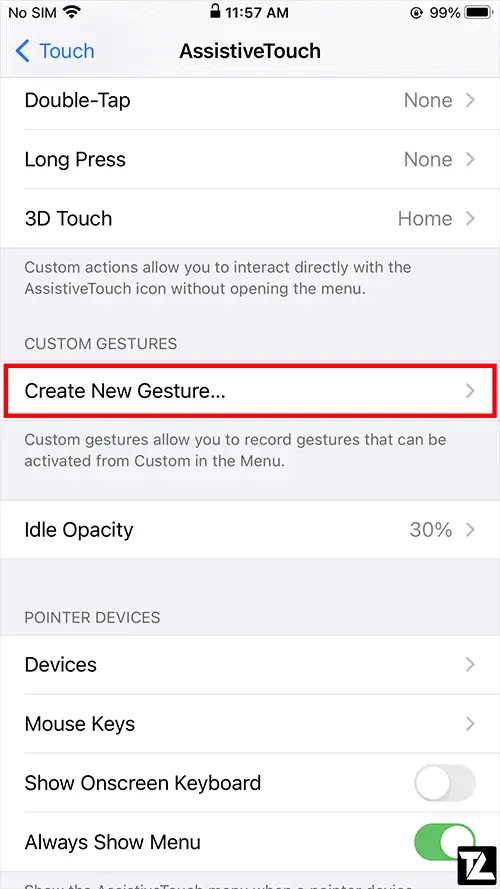
We can also use gestures like pinch, 3D Touch, and Double-Tap. We can also set our custom gestures by tapping on ‘+‘ in AssistiveTouch or from Settings > Accessibility > Touch > AssistiveTouch > Create New Gesture...
Was this guide helpful?
Don’t forget to share with your friends on Facebook, Twitter, and other social media platforms.
LEAVE A REPLY